
Introduction: Your Journey to the Perfect Pool & Spa
There’s nothing quite like the allure of cool, crystalline water beckoning you into your very own backyard oasis. A thoughtfully designed pool and spa not only elevates the value and beauty of your home—it transforms your lifestyle, providing a sanctuary for relaxation, social gatherings, and wellness. In 2025, advances in materials, technology, and sustainability have unlocked unprecedented possibilities for customization, efficiency, and ease of care.
In this first installment of Aqua Excellence, we’ll guide you through the critical Planning & Design phase—laying the groundwork that turns your vision into reality. You’ll learn to:
-
Clarify your goals and lifestyle needs
-
Evaluate site conditions and zoning requirements
-
Choose the ideal pool and spa types and styles
-
Integrate sustainability, automation, and safety from day one
-
Assemble your dream design team
-
Develop a comprehensive budget and timeline
Armed with expert advice, data-driven insights, and professional checklists, you’ll emerge ready to draft a blueprint that aligns with your vision—and your home’s unique constraints. Let’s dive in.
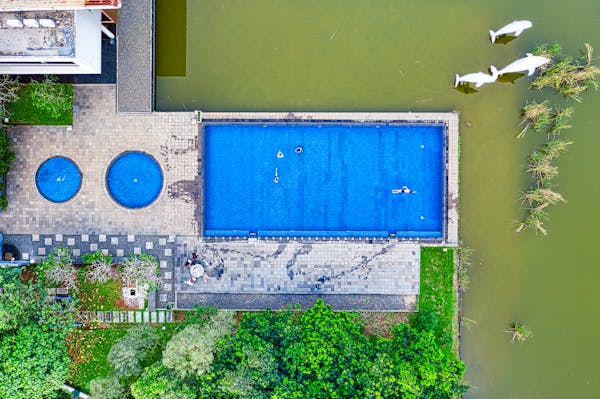
pool spa
1. Defining Your Goals & Lifestyle Requirements
A successful project begins with crystal-clear objectives. Before you sketch or solicit quotes, ask:
-
Primary Purpose: Recreation, exercise (lap pools), relaxation (spa jets), entertaining, or multi-use?
-
User Profiles: Children, seniors, fitness enthusiasts, party hosts—each has unique safety, depth, and feature requirements.
-
Design Aesthetic: Modern geometric, freeform tropical, naturalistic lagoon, or minimalist European spa?
-
Seasonal Use & Climate: Will you heat year-round? Do you need cover systems for leaves or freeze protection?
-
Maintenance Commitment: DIY care vs. professional service plans?
Expert Insight
“Clarifying who uses the pool and how often dictates nearly every other decision—from depth profiles to automation levels. Don’t skip this foundational step.”
— Sophia Ramirez, Aquatic Designer, International Pool & Spa Conference 2024
1.1. Activity & Amenity Matrix
| Activity | Recommended Features | Depth | Additional Considerations |
|---|---|---|---|
| Lap Swimming | Long rectangular shape, lane markers | 4–5 ft minimum | Smooth tile floor, lane lighting |
| Family Recreation | Shallow play ledge, zero-entry | 0–3 ft | Non-slip decking, safety fencing |
| Spa Therapy | Built-in bench seating, high-output jets | 3–4 ft (spa) | Dedicated heater, cover lifter |
| Entertaining | Integrated bar, swim-up ledge | 3–5 ft | Underwater lighting, built-in speakers |
| Aesthetic Water Feature | Waterfalls, vanishing edges | Varies | Natural stone, ambient LED lighting |
2. Site Evaluation & Regulatory Framework
Your yard’s topography, soil conditions, and local regulations critically shape what’s possible. A thorough site assessment prevents costly surprises.
2.1. Soil & Drainage Analysis
-
Percolation Tests: Determine soil’s ability to absorb water—vital for pool deck drainage and spa backwash disposal.
-
Borehole Samples: Assess soil composition (clay, silt, sand) to anticipate excavation challenges and footing design.
-
Groundwater Table: High water tables may require specialized underslab drainage or waterproofing.
Pro Tip: “Ask for a geotechnical report—skipping it is like building your dream home on quicksand.”
— Dr. Amir Patel, Geotechnical Engineer
2.2. Zoning, Permits & HOA Guidelines
-
Setbacks & Easements: Minimum distances from property lines, easements, and existing structures.
-
Fence & Barrier Requirements: Local codes often mandate 4–5 ft barrier walls or self-closing gates for child safety.
-
Utility Locates: Identify underground utilities—gas, water, electric—before excavation.
-
HOA Design Review: Covenants may dictate materials, colors, or even pool visibility from streets.
3. Selecting Your Pool & Spa Type
From traditional inground to above-ground, and from fiberglass shells to shotcrete “gunite,” your material choice impacts cost, durability, and design flexibility.
3.1. Construction Methods
| Method | Pros | Cons |
|---|---|---|
| Gunite/Shotcrete | Unlimited shapes, highly durable | Longer build time, higher hydrostatic lift risk |
| Vinyl Liner | Lower upfront cost, soft underfoot | Liner replacement every 7–10 years |
| Fiberglass Shell | Fast installation, smooth finish, lower maintenance | Limited shapes/sizes, shipping constraints |
3.2. Spa Integration Options
-
Attached Spa: Shared filtration and heater—economical, cohesive design
-
Detached Spa: Independent control, flexible placement, higher install cost
-
Bonded Spa: Spa deck flows directly into pool—striking infinity effect but complex plumbing
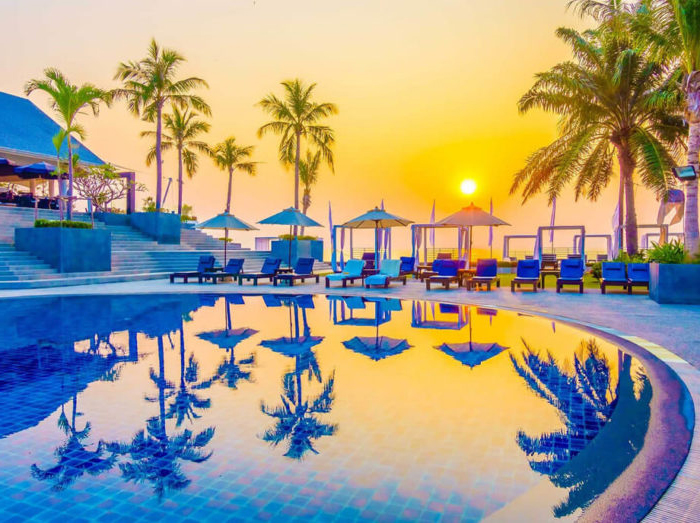
pool of the year
4. Sustainable & Smart Design Integration
Building a green, connected pool today means lower operating costs and a smaller ecological footprint over decades.
4.1. Energy-Efficient Equipment
-
Variable-Speed Pumps: Up to 90% energy savings vs. single-speed pumps
-
High-Efficiency Heaters & Heat Pumps: Gas vs. electric heat-pump comparative ROI
-
LED Lighting: 80% less energy, 25,000-hour lifespan, color tunability
4.2. Automation & Water Conservation
-
Smart Controls: Remote scheduling of pumps, heaters, lighting, and covers via app
-
Automatic Pool Covers: Reduce evaporation by 50–70%, enhance safety
-
Rainwater Harvesting & Backwash Recycling: Integrate with rain gutters and dedicated storage tanks
5. Assembling Your Design & Build Team
A multidisciplinary team ensures comprehensive expertise:
-
Pool Designer/Aquatic Architect
-
Geotechnical/Structural Engineer
-
Landscape Architect
-
Licensed Pool Contractor
-
Electrician & Plumber (specializing in pools)
-
Permit Expediter or Consultant
Case Study Snippet: The Greene Estate in Scottsdale achieved a 6-month completion for a zero-entry gunite pool with integrated spa by coordinating all trades through a dedicated project manager—resulting in zero schedule overruns and a 12% lower-than-estimated cost.

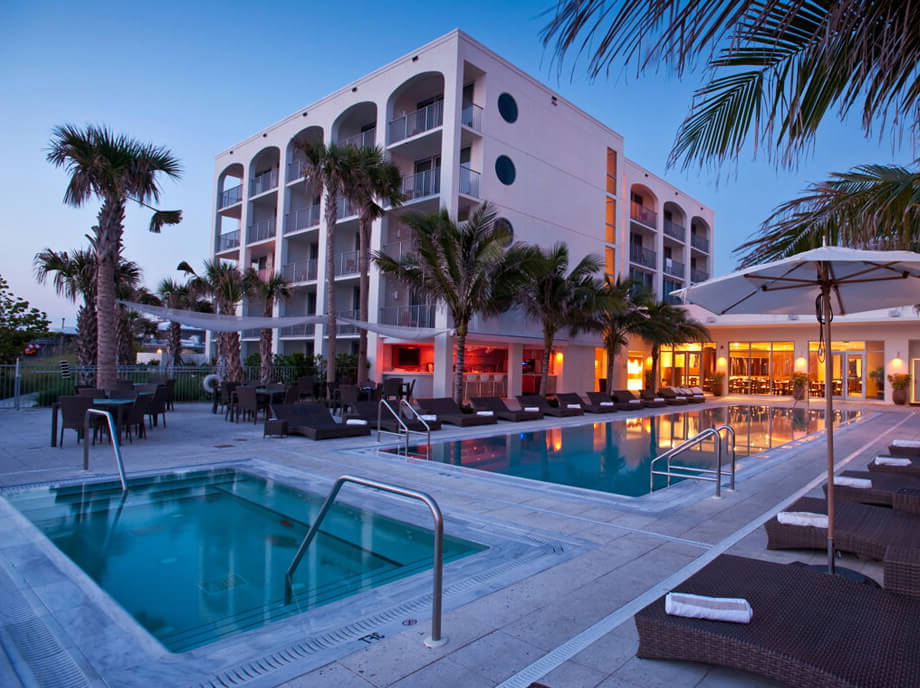
travel-portfollio-img-9-opt.jpg
6. Budgeting & Preliminary Timeline
| Line Item | % of Total Budget | Notes |
|---|---|---|
| Design & Permits | 8–12% | Engineering, landscaping consultation |
| Excavation & Shell | 20–25% | Gunite shell, base materials |
| Equipment & Automation | 15–20% | Pumps, heaters, controls |
| Decking & Hardscape | 20–25% | Coping, decking, walkways |
| Finishes & Features | 15–20% | Tile, plaster, water features, lighting |
| Landscaping & Furnishings | 10–15% | Plantings, furniture, shade structures |
| Contingency | 10% | Unforeseen site conditions |
Preliminary Timeline:
-
Weeks 1–4: Design development & permitting
-
Weeks 5–8: Excavation, footing & shell installation
-
Weeks 9–12: Equipment installation & rough plumbing/electrical
-
Weeks 13–16: Decking, coping & hardscape
-
Weeks 17–20: Finishes—plaster, tile, water features
-
Weeks 21–24: Landscaping, furniture, final inspections
With clear goals, a detailed site assessment, informed material choices, and a sustainable, tech-forward mindset, you’re equipped to craft a pool & spa that delivers decades of joy and wellness. In Part 2, we’ll dive into Construction & Installation—covering project mobilization, quality control, and overcoming common build-phase challenges.
With your vision solidified and all permits in hand, it’s time to break ground. Part 2 dives deep into the nuts and bolts of construction and installation—covering site mobilization, excavation, shell construction, equipment setup, decking, and finishes. We’ll share expert best practices, troubleshooting guidance, and professional checklists to ensure your pool and spa not only meet code but exceed your expectations for durability and performance.
1. Site Mobilization & Pre-Construction Prep
Before heavy machinery arrives, meticulous preparation prevents delays and cost overruns.
1.1. Staging Area & Access
-
Equipment Laydown: Designate secure zones for materials, tools, and machinery.
-
Erosion Control: Install silt fences and gravel tracking pads to protect landscaping.
-
Utility Locates: Reconfirm all underground lines in collaboration with 811 services.
Pro Tip: Conduct a “Pre-Mobilization Walkthrough” with all subcontractors on site to align on access routes, staging zones, and safety protocols.
1.2. Safety & Compliance
-
OSHA Requirements: Hard hats, eyewear, fall protection, and daily toolbox talks.
-
Local Inspections: Coordinate with inspectors for initial trench, footing, and foundation checks.
-
Environmental Protections: Ensure spill kits, proper fuel storage, and dust-control measures.
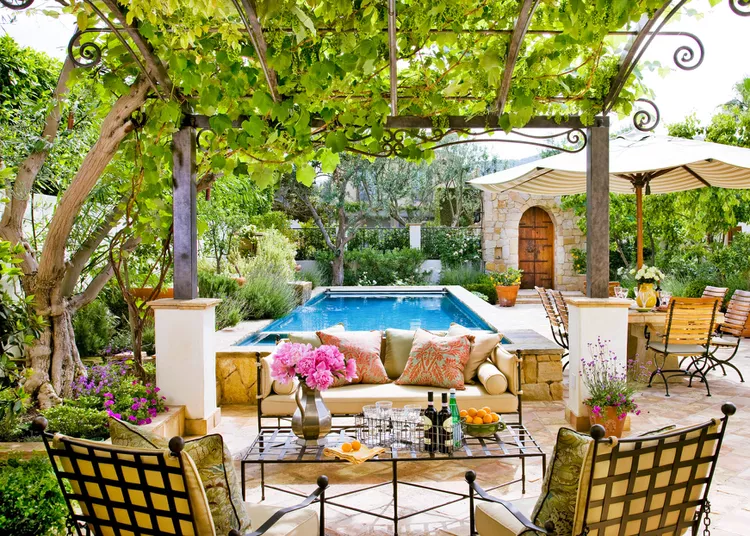
beautiful-backyard
2. Excavation & Shell Formation
The pool shell is the structural heart of your project. Precision here guarantees longevity.
2.1. Excavation Techniques
-
Machine Excavation: Backhoe and skid-steer usage—optimal for hard soils.
-
Manual Overdig: Hand-digging around grade lines to prevent damage to nearby structures.
-
Spoil Management: Stockpile topsoil separately for final landscaping reuse.
2.2. Base Preparation
-
Compacted Aggregate Base: 4–6″ of crushed stone, mechanically compacted to 95% proctor density.
-
Sand Bedding Layer: 1–2″ screeded sand to create a level bed for the shell.
2.3. Shell Construction Methods
| Shell Type | Process | Key Considerations |
|---|---|---|
| Gunite/Shotcrete | Steel rebar cage → shotcrete application | Requires curing time, hydrostatic relief |
| Fiberglass | Preformed shell drop-in → backfill & leveling | Tight tolerances, anchoring straps |
| Vinyl Liner | Steel/aluminum wall panels → liner installation | Liner wrinkles, seasonal expansion |
Expert Insight
“For custom shapes and greater structural strength, shotcrete is unbeatable—provided you allow adequate cure time and install proper drainage.”
— Carlos Mendes, Shotcrete Specialist
3. Plumbing, Electrical & Mechanical Rough-In
With the shell in place, threading water and power through your oasis begins.
3.1. Plumbing Layout
-
Return & Suction Lines: 2–3 returns and at least one main drain per 500 sq ft.
-
Equipment Pad to Pool Piping: Use schedule 40 PVC, properly sloped and solvent-welded.
-
Backwash Disposal: Integrate with storm drains or dedicated dry wells per code.
3.2. Electrical & Bonding
-
Pump & Equipment Circuits: Dedicated GFCI-protected breakers sized per NEC 680.
-
Lighting Circuits: Low-voltage LED fixtures with in-pool transformers in separate enclosures.
-
Equipment Bonding & Grounding: #8 copper conductor around the perimeter and to all metallic parts.
3.3. Filtration & Heating Equipment
-
Pump Selection: Variable-speed pump sized for 1–1.5 ft of head per 10 GPM of flow.
-
Filter Types: Cartridge vs. sand vs. DE—balance backwash frequency, clarity, and space.
-
Heater Integration: Heat pump vs. gas heater—consider local energy costs and runtime requirements.
Pro Tip: Install isolation valves on each piece of equipment for easy service without full system shutdown.
4. Decking, Coping & Hardscape
Decks frame your pool and spa, providing safe, durable, and attractive surfaces.
4.1. Coping Options
-
Precast Concrete: Economical, consistent, but limited shapes.
-
Natural Stone: Travertine, limestone, or granite—luxurious, slip-resistant, and cool to the touch.
-
Bullnose Tile: Slips seamlessly from tile into deck; ideal for geometric designs.
4.2. Deck Materials & Installation
| Deck Type | Durability | Maintenance | Aesthetic |
|---|---|---|---|
| Broom-Finish Concrete | High | Low (sealant) | Modern clean lines |
| Pavers | Very High | Moderate (joint sand) | Versatile patterns |
| Composite Decking | High | Very Low | Wood-like warmth |
| Natural Stone | Very High | Low (sealant) | Organic elegance |
4.3. Expansion Joints & Drainage
-
Joint Placement: Every 10–12 ft or at material changes to prevent cracking.
-
Drainage Channels: Trench drains or channel drains at deck edges directing water away from the foundation.
5. Pool Finishes & Water Features
The visible surfaces and water features give your pool personality and comfort.
5.1. Interior Finishes
-
Plaster (White/Colored): Classic, cost-effective, but prone to etching.
-
Quartz Aggregate: Blends with plaster for added durability and color depth.
-
Tile & Mosaics: High-end accent borders, waterline tile, and custom murals.
5.2. Water Features
-
Sheer Descent Fountains: Thin stainless-steel ribbons for modern elegance.
-
Scuppers & Spillways: Brick or stone-integrated features creating movement and sound.
-
Deck Jets & Laminar Arches: Playful jets arching into the pool—ideal for children’s play areas.
Case Study: A Scottsdale residence installed a travertine bullnose coping with LED-lit sheer descent fountains. The result? A resort-grade ambiance that increased nightly home rentals by 25%.
6. Spa & Specialty Installations
Attached or standalone, the spa element requires focused attention on hydraulics and ergonomics.
6.1. Jet Placement & Flow Rates
-
Therapeutic Bench Jets: Position for lower back comfort.
-
Neck & Shoulder Jets: High-flow, directional nozzles for targeted relief.
-
Air Induction Jets: Mix air with water for softer, swirling streams.
6.2. Temperature Control & Insulation
-
Dedicated Heater or Heat Pump: Spa may need 1.5–2× the capacity of pool heater.
-
Thermal Blankets & Covers: Minimum R-value of 10 to minimize heat loss overnight.
-
Insulated Shell: Spray-foam insulation beneath spa shell for energy retention.
By methodically executing excavation, plumbing, electrical, decking, and finish work with professional precision, your pool and spa begin to take true form. In Part 3, we will address commissioning, water chemistry mastery, automation programming, and the first-year care roadmap—ensuring your aquatic oasis runs flawlessly from day one.
Your pool and spa are built—but the real journey begins now. Proper commissioning, balanced water chemistry, and smart automation ensure crystal-clear water, efficient operations, and minimal manual intervention. In this extensive third part, we’ll cover:
-
Commissioning Checklist
-
Understanding & Managing Water Chemistry
-
Programming & Optimizing Automation Systems
-
First-Year Care Roadmap
-
Troubleshooting Common Operational Issues
-
Expert Insights
By the end, you’ll have the knowledge to start—and keep—your pool & spa in peak condition.
1. Commissioning Checklist: From Startup to First Swim
Before filling, heating, or turning on equipment, follow this structured commissioning process:
| Step | Task | Responsible Party |
|---|---|---|
| Structural Inspection | Confirm shell integrity, coping alignment | Contractor/Engineer |
| Plumbing Pressure Test | 1.5× working pressure, watch for drops over 15 minutes | Plumber |
| Electrical Safety Check | Verify GFCI, bonding continuity, proper voltage | Electrician |
| Equipment Dry Run | Run pump, filter, heater with no water load to check vibrations | Technician |
| Initial Fill & Leak Check | Fill to skimmer level, inspect all fittings for leaks | Pool Owner/Contractor |
| Filter Prime & Drain | Allow air to escape, then backwash/clean per instructions | Technician |
| Chemical Start-Up | Shock dose, adjust pH to 7.4–7.6, set sanitizer level | Pool Professional |
| Automation Calibration | Connect controllers, program schedules, test remote app | Automation Specialist |
Pro Tip: Document each step with photos and notes—this record is invaluable for warranty claims and future troubleshooting.
2. Understanding & Managing Water Chemistry
Balanced water chemistry preserves equipment, prevents algae, and ensures comfort. Key parameters:
| Parameter | Ideal Range | Function | Test Frequency |
|---|---|---|---|
| pH | 7.4–7.6 | Comfort, chlorine efficacy | Daily (first month), Weekly thereafter |
| Total Alkalinity | 80–120 ppm | pH buffer, prevents swings | Weekly |
| Calcium Hardness | 200–400 ppm | Prevents corrosion and scaling | Monthly |
| Sanitizer (Free Chlorine or Bromine) | 1–3 ppm (Cl₂), 3–5 ppm (Br₂) | Disinfection | Daily (pool), Every other day (spa) |
| Cyanuric Acid (Stabilizer) | 30–50 ppm | Protects chlorine from UV degradation | Monthly |
2.1. Shock & Oxidation
-
Non-Chlorine Shock (Potassium Monopersulfate): Sanitize without raising chlorine; ideal weekly.
-
Calcium Hypochlorite Shock: Rapid chlorine boost; use monthly or after heavy use.
2.2. Algae Prevention & Treatment
-
Preventative Algaecides: Monthly dose of polymer-based algaecide reduces chances of bloom.
-
Algae Treatments: Use multi-functional shock (chlorine + algaecide) and brush surfaces vigorously.
Expert Insight
“Consistent, small adjustments beat sporadic, large chemical doses. Automation helps—but manual testing and fine-tuning remain essential.”
— Dr. Helena Ruiz, Aquatic Chemist
3. Programming & Optimizing Automation Systems
Automation is your best ally for consistent water quality and energy savings. Common systems include Pentair IntelliCenter, Hayward OmniLogic, and Zodiac iAquaLink.
3.1. Equipment Scheduling
-
Pump Run Times: Set main pump for 8–12 turnover cycles daily (e.g., 3 × 4-hour cycles) during off-peak electricity hours.
-
Heating Schedules: Program spa heat-up 1–2 hours before typical use; maintain pool heat minimally overnight.
-
Lighting & Features: Automate LED color scenes and water features for dusk-to-dawn or event-based activation.
3.2. Sensor Integration
-
pH & ORP Probes: Real-time chemical dosing via chemical feeders tied to sensor readings.
-
Flow & Pressure Sensors: Alert if bypass flow is detected or system head changes—indicating blockages or pump issues.
-
Leak Detection: Under-deck sensors or splice-box alerts can detect water intrusion early.
3.3. Remote Access & Alerts
-
Mobile App Setup: Configure user profiles, geofencing (auto-disable for safety), and push notifications for system failures or chemical alarms.
-
Voice Control: Integrate with Alexa or Google Home for simple verbal commands (“Alexa, turn on pool pump”).
Pro Tip: Frequently review system logs to identify trends—like increasing run-times—that signal filter cartridge replacement or other maintenance.
4. First-Year Care Roadmap
The first year sets the tone for easy ownership. Follow these seasonal guidelines:
Spring Startup (March–May)
-
Remove Cover & Clean Deck
-
Inspect Equipment & Reconnect Automation
-
Shock & Balance Water
-
Run Full System & Check for Leaks
Summer Maintenance (June–August)
-
Weekly pH & Sanitizer Testing
-
Biweekly Algaecide & Clarifier
-
Monthly Filter Cartridge Cleaning
-
Inspect Decking & Coping for Wear
Fall Prep (September–November)
-
Lower Water Level & Backwash
-
Winterize Automation & Heaters
-
Cover & Secure the Pool
Winter Checks (December–February)
-
Monthly Cover Inspection
-
Maintain Automated Chemical Feeder Batteries
-
Check for Debris Accumulation
| Season | Key Tasks | Goal |
|---|---|---|
| Spring | Startup, shock, leak test | Full readiness |
| Summer | Regular chemistry, equipment checks | Optimal clarity & safety |
| Fall | Winterize, lower maintenance | Prevent freeze/winter damage |
| Winter | Monitor cover, minimal intervention | Protect infrastructure |
5. Troubleshooting Common Operational Issues
Even the best-planned systems encounter hiccups. Here are concise solutions:
| Problem | Possible Cause | Solution |
|---|---|---|
| Cloudy Water | Imbalanced chemistry, clogged filter | Check and adjust pH/alkalinity; clean filter |
| Pump Not Running | Tripped breaker, airlock | Reset breaker, bleed air from pump housing |
| Heater Won’t Ignite | Gas supply off, ignition fault | Check gas valve, clean igniter or call tech |
| Algae Growth | Poor circulation, low sanitizer | Shock, brush surfaces, run pump longer |
| Cover Won’t Retract | Motor/jack failure, debris | Inspect motor, clear tracks, lubricate |
Conclusion
With commissioning complete, water chemistry mastered, and automation finely tuned, your pool and spa are ready for effortless enjoyment. The first-year care roadmap and troubleshooting tips ensure you stay ahead of issues—maximizing your oasis’s performance and lifespan. In Part 4, we’ll explore advanced upgrades, feature additions, and long-term renovation strategies to keep your aquatic environment at peak excellence.